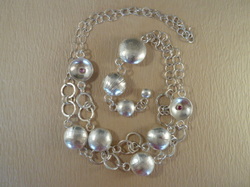
This 42" sterling silver necklace took me some 30 hours to complete.
With the exception of the chain at the very top, I made every link. I typically enjoy soldering jump rings (the rings that make up each link of chain), but as the remainder of the necklace was near completion I ran out of steam. I just wanted it finished!
With the exception of the chain at the very top, I made every link. I typically enjoy soldering jump rings (the rings that make up each link of chain), but as the remainder of the necklace was near completion I ran out of steam. I just wanted it finished!
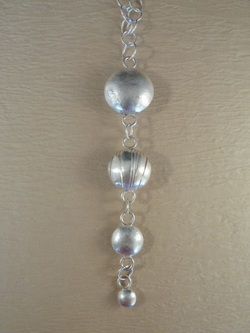
The necklace is asymmetrical in the body with 4 closed beads of decreasing size that dangle down the center.
The body comprises of 2 open concave pieces, one with a synthetic ruby and one with a synthetic pink sapphire, and 4 closed beads.
The closed beads were textured by passing the silver sheet through a rolling mill with sand paper and a plastic fruit bag from the grocery store. One of the beads was textured by soldering wire to a silver sheet.
The circles were cut with a disc cutter, then shaped into a concave form with dapping tools, sanded and soldered together with care.
In fact, I was frightful of beads exploding in my face due to the expansion of gases while soldering 2 concave pieces together. Alas, no such thing happened!
| 
| 
|
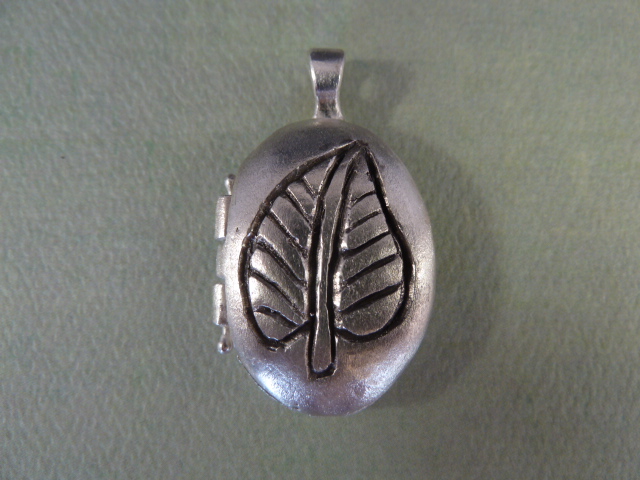
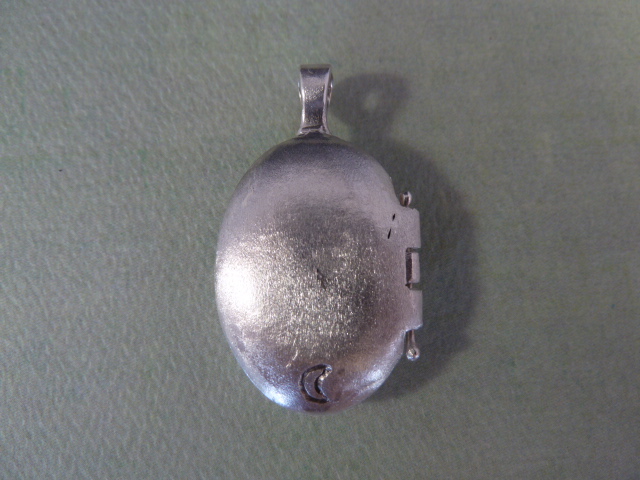
The leaf locket above was made through the process of lost wax casting, something that is not really my thing, so to speak. Although some folks find existing objects, like leaves, plastic toys or other previously made items, most sculpt an object in wax meticulously for hours before casting their work of art. Not my thing.
I took up lost wax casting in order to make sterling silver buttons with a crescent moon insignia in them to use in my leather work, but I continued to work on projects in lost wax casting to challenge myself and improve my skills.
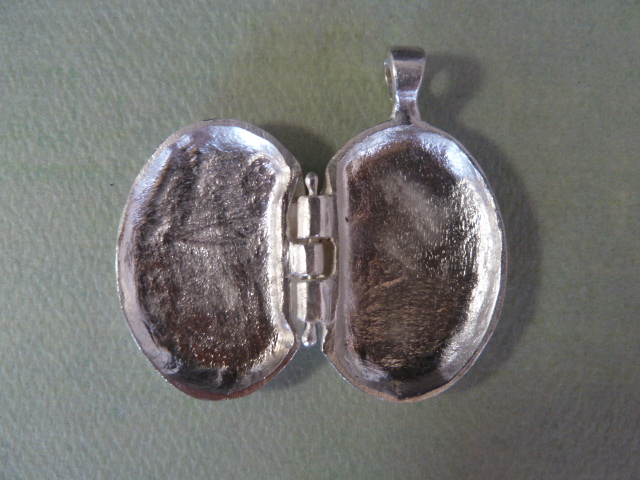
The locket was carved in green wax. The hinge was particularly challenging for me to line up, and when I hollowed the front piece of the locket, the wax broke in two. Fortunately wax is rather forgiving, and I put the piece back together with melted wax... no less than three times.
Somehow I did not measure sufficient silver for the project. So when it was cast, a big chunk of the lower right front of the locket was missing. Fortunately the leaf design was intact, and I used the torch to melt silver wire onto the locket. Then I sanded the globs of silver down, as well as the entire locket, to give it a smoother matte finish.
The pin in the hinge is work hardened sterling silver wire, which "balled up" nicely when I put the torch's flame to it.
Finally I used a solution of hydrochloric acid and tellurium, known as Black Max, to give blacken the leaf design and the moon insignia on back.
I still have to put a closing mechanism on the locket, if I want to be sure it doesn't swing open while wearing...
But I'm already off to the next project!
I took up lost wax casting in order to make sterling silver buttons with a crescent moon insignia in them to use in my leather work, but I continued to work on projects in lost wax casting to challenge myself and improve my skills.
The locket was carved in green wax. The hinge was particularly challenging for me to line up, and when I hollowed the front piece of the locket, the wax broke in two. Fortunately wax is rather forgiving, and I put the piece back together with melted wax... no less than three times.
Somehow I did not measure sufficient silver for the project. So when it was cast, a big chunk of the lower right front of the locket was missing. Fortunately the leaf design was intact, and I used the torch to melt silver wire onto the locket. Then I sanded the globs of silver down, as well as the entire locket, to give it a smoother matte finish.
The pin in the hinge is work hardened sterling silver wire, which "balled up" nicely when I put the torch's flame to it.
Finally I used a solution of hydrochloric acid and tellurium, known as Black Max, to give blacken the leaf design and the moon insignia on back.
I still have to put a closing mechanism on the locket, if I want to be sure it doesn't swing open while wearing...
But I'm already off to the next project!
 RSS Feed