Ask anyone here, and they will tell you things are expensive in Brazil. Add to that the fact that I have little patience for shopping around town. Those who know me well also know that I am loathe to buy something that will only be used once. Gratefully I love learning, and I love creating. So during the past few months I've taken to learning and creating a few things (that are not jewelry).
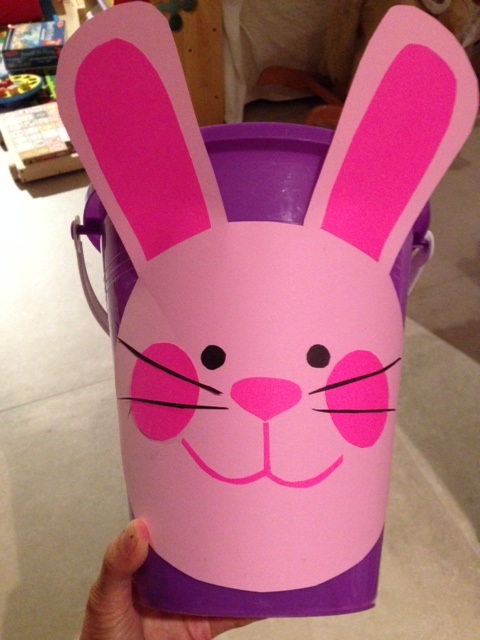
Without an Easter basket for our daughter Jade, I put this together using her sand bucket, double stick tape and existing card stock at home... only to discover when we arrived at the egg hunt that baskets were provided!
Without an Easter basket for our daughter Jade, I put this together using her sand bucket, double stick tape and existing card stock at home... only to discover when we arrived at the egg hunt that baskets were provided!
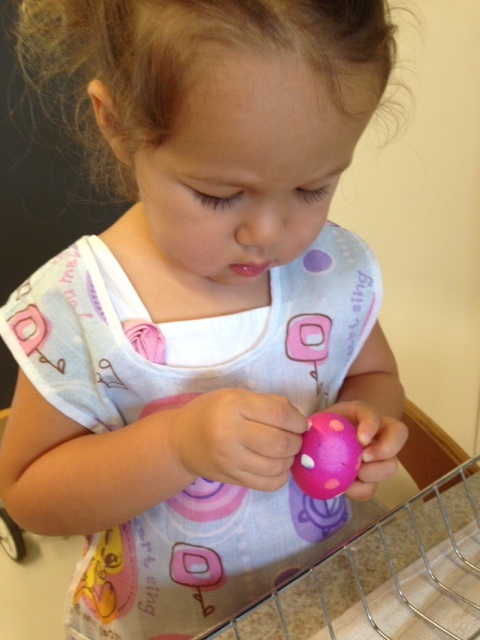
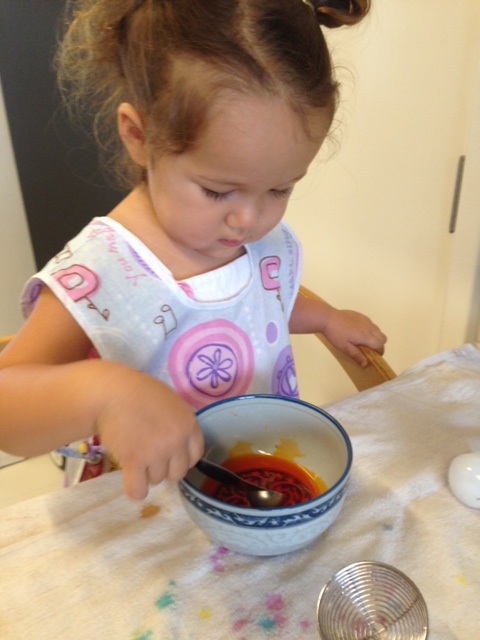
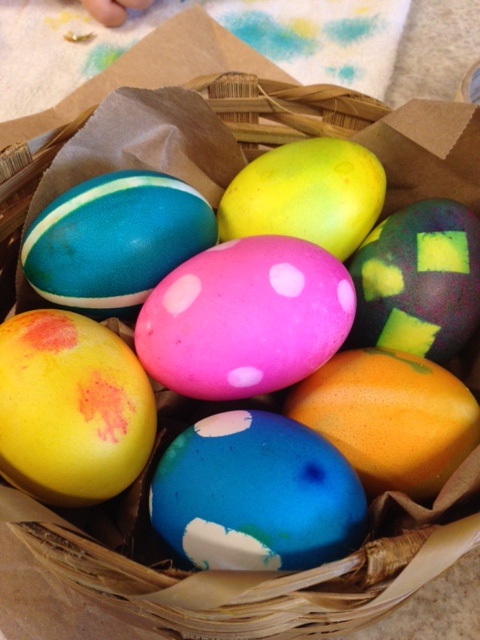
This year she participated in coloring the few eggs we had. We started with a dozen eggs. 1 broke on the way home from the grocery store. 3 cracked while being hard boiled, and Jade dropped 1 after it was colored. That left us with these 7. Good thing I didn't buy only a half dozen!
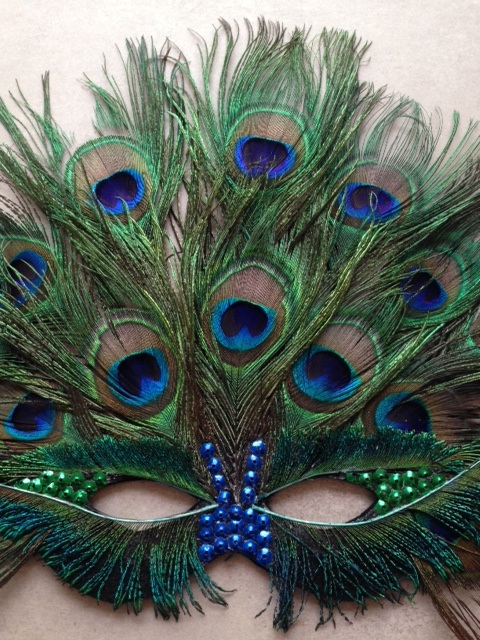
My husband and I recently attended a masquerade gala in São Paulo. Although there are many mask-makers in town, I decided to create masks from materials initially bought to make a costume for the Carnival ball we attended in Rio de Janeiro earlier this year. (I was inspired to replicate a sexy peacock costume my friend Irena created one Halloween, only to discover the ball's theme was Olympia, a tribute to the Olympics, which will take place in Rio later this year...oops and duh.)
The feathers, felt and ribbon came in handy. I also already had thread, glue and a greenish blue nail polish, though I bought a few sequins to embellish the masks. I learned to customize masks to a person's face using plastic wrap and how to stiffen felt with glue and water. Within 30 minutes (not including drying time), my mask was completed:
The feathers, felt and ribbon came in handy. I also already had thread, glue and a greenish blue nail polish, though I bought a few sequins to embellish the masks. I learned to customize masks to a person's face using plastic wrap and how to stiffen felt with glue and water. Within 30 minutes (not including drying time), my mask was completed:
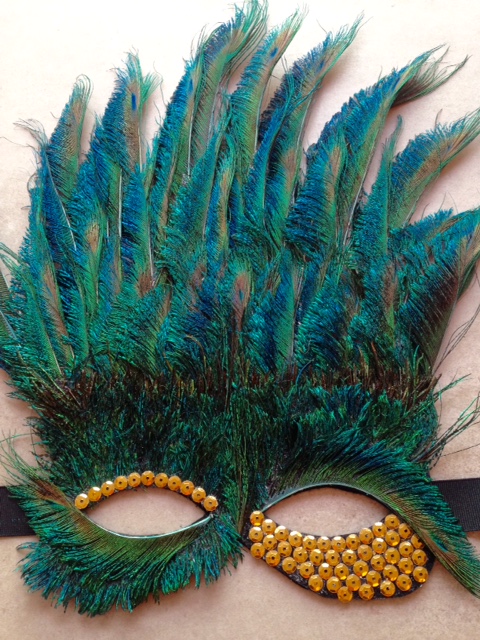
My husband's mask was another story. His comprised of many more feathers. Then to give it a more masculine look, I cut feathers into shreds to glue onto the body of the mask. His took a grueling 2 hours to complete:
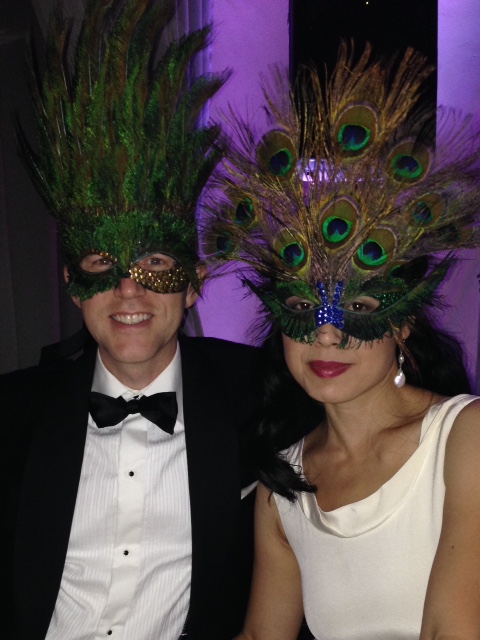
The masks go well together, in my opinion.
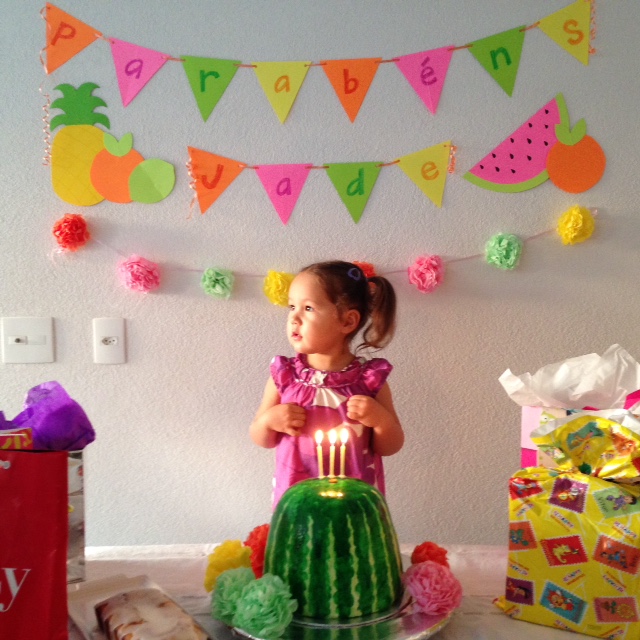
Sometime after we moved to São Paulo, watermelon inspired the theme of Jade's 3rd birthday party. Watermelon is one of the few fruits she will eat, and watermelon juice is often her choice of "cocktail to relax" when we go out to a restaurant.
While searching for an Evite design, I came across "Let's Get Tutti Frutti", and that completed the theme for her birthday party.
Using the colors from the Evite design, I made tissue paper flowers, pennant streamers and fruit mostly out of used tissue paper and ribbon, wire ties from bread bags, card stock scrap, and her washable crayons.
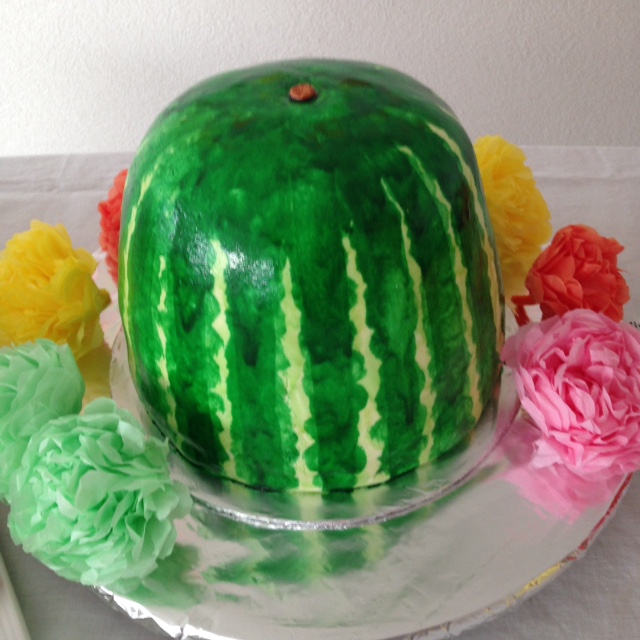
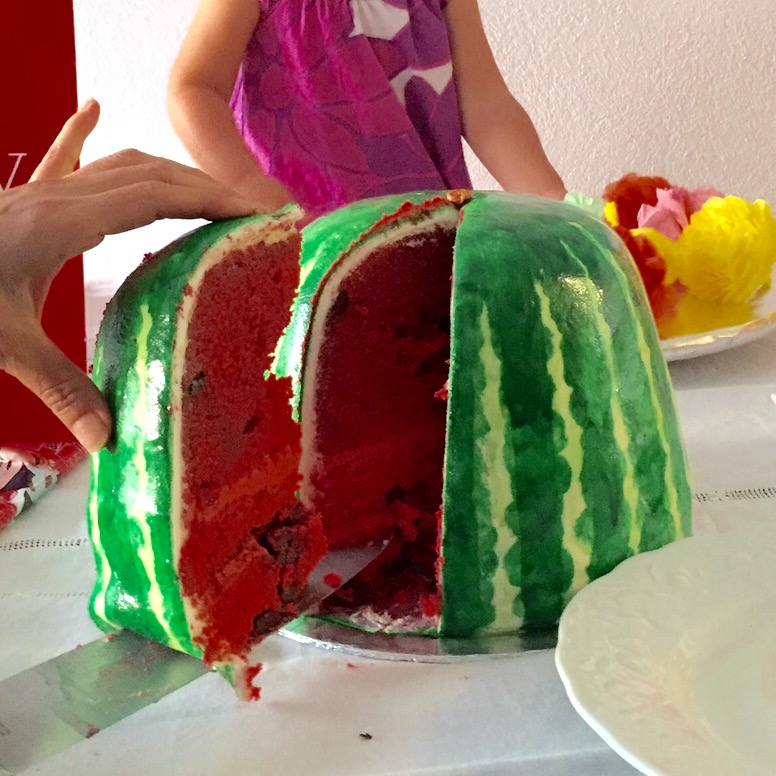
When I shared the watermelon inspiration with my husband, he showed me a video of how to make a watermelon cake (Yolanda Gampp's How to Cake It), and I decided I was up to the challenge. Crazy, I know, because I'm not a baker. I did learn a great deal baking this cake...about weight and density, how difficult it can be to make Italian meringue frosting, using the right sized chocolate chips (as the seeds), rolling out and placing the fondant over the cake, painting fondant, how to use the oven...
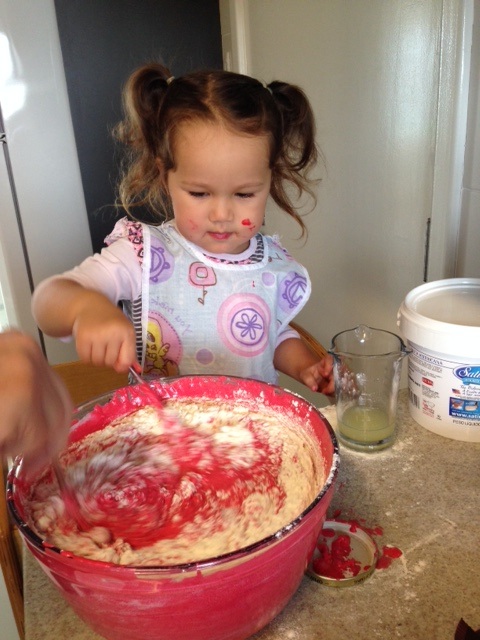
And I had the cutest sous-chef.
And I had the cutest sous-chef.
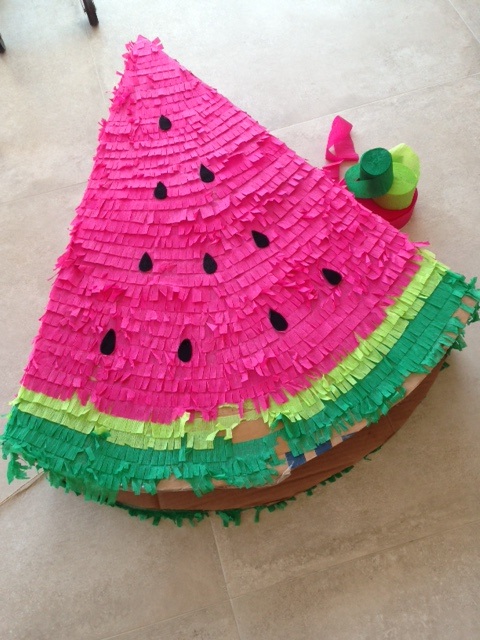
What better way to complete a party than to have a (watermelon) piñata? All you need are cardboard boxes (used moving boxes, in our case), packing tape, glue, and streamers. The great thing is that even after smashing it open, as you see here, add some new streamers and glue, stuff new party favors, tape on a new cardboard base, and the piñata will be ready for action again. This was my first piñata, and it only took 90 minutes to make.
I must admit that my daughter is a terrific muse. Without her, I might not learn to do such fun projects, and I would not be this creative mommy.
 RSS Feed